Signs Your HID Ballast Is Failing
- charlielojera
- Mar 24
- 16 min read
There's a particular kind of frustration that comes with HID lighting problems. The system worked perfectly for months or even years, and now something's not right ,one light takes ages to come on, there's an annoying flicker on the driver's side, or you're finding yourself with one headlight out on a dark stretch of highway outside Cunnamulla at 10pm on a Friday.
HID lighting systems have more components than halogen setups, which means more ways things can go wrong. But the good news is that failures tend to follow patterns, and those patterns are pretty telling once you know what to look for. Most of the time, a methodical approach to diagnosis will tell you fairly quickly whether it's the control unit, the lamp, or something else in the circuit.
This guide covers every meaningful symptom of a failing HID control unit ,what it looks like, why it happens, and how to confirm whether that component is actually the culprit before you spend money replacing something that might be fine.
Quick Reference: What Failing Looks Like
Before diving into each symptom in detail, here's a snapshot of the most common warning signs:
• One or both lights flickering after they've fully warmed up
• Lights taking several seconds ,or multiple on-off cycles ,to ignite
• One light working, the other completely dead
• Lights cutting out intermittently and then recovering
• Visible colour shift ,one light appears noticeably more yellow or pinkish than the other
• Burning smell from the engine bay around the lighting components
• Corrosion, burn marks, or physical damage on the unit itself
• Dashboard warning light indicating a lighting fault
If you're seeing any combination of the above, the control unit for your HID system is near the top of the suspect list. The rest of this guide explains what's happening mechanically or electronically inside the unit when each symptom occurs ,and gives you the tools to confirm the diagnosis.
Understanding What the Control Unit Is Managing
To understand why specific symptoms occur, you first need a mental picture of what the control unit is doing at any given moment. HID lamps don't run directly off your vehicle's 12-volt supply ,they require completely different electrical conditions to operate.
When you switch on an HID headlight, the control unit does three things in rapid sequence: it generates a brief high-voltage pulse to ignite the arc inside the lamp, it provides elevated current during the warm-up phase as the lamp reaches operating temperature, and it then regulates a stable lower-power supply during normal operation.
Any weakness in the electronics responsible for any of these three phases will produce a specific, recognisable symptom. A unit failing in its ignition circuit looks different from one that's degrading in its regulation circuitry. Understanding this helps you interpret what you're seeing rather than just replacing parts on speculation.
Sign 1: Flickering After the Light Has Fully Warmed Up
This is the most commonly reported symptom of a degrading HID control unit, and it's one of the more diagnostically specific ones ,meaning it points fairly directly at the control unit rather than other components.
Why the Timing Matters
It's important to distinguish between flickering that occurs in the first 20–30 seconds and flickering that happens once the lamp is fully warm. During the warm-up phase, some inconsistency in the arc is normal ,the metal halide chemistry inside the lamp is still vaporising, and the arc isn't fully stabilised until operating temperature is reached. A small amount of variation during this phase doesn't indicate a fault.
Flickering that begins or continues after the lamp is fully warm is a different matter. At this point, the control unit should be in steady-state regulation mode ,providing a clean, stable power supply to maintain the arc. Flickering during this phase means the unit's regulation circuitry is struggling. It can't maintain consistent output, so the arc fluctuates as the supply wavers.
What Causes This Internally
Inside the control unit, steady-state regulation is handled by capacitors, transistors, and control IC circuits that maintain consistent output despite variations in the vehicle's 12V supply. These components degrade over time ,capacitors lose capacitance, solder joints develop micro-cracks from thermal cycling, and semiconductor components age.
As they degrade, the regulation becomes less precise. The lamp receives slightly varying power, the arc fluctuates, and the visible result is flicker. In early stages this might be subtle ,a brief flutter every few minutes. As the degradation progresses, the flickering becomes more frequent and more pronounced.
Distinguishing from Other Causes
Flickering after warm-up can occasionally be caused by a failing lamp (end of lamp life) or a loose wiring connection. To confirm:
• Swap the control unit from the flickering side to the other side. If the flicker follows the unit, it's confirmed as the cause
• Check all wiring connections for corrosion or looseness ,a poor connection can produce intermittent flickering that mimics a failing unit
• If the flickering appears consistently and follows the unit during the swap test, replacement is the correct action
Sign 2: Slow or Delayed Ignition
A healthy HID system ignites almost immediately when switched on. There's a brief millisecond gap, a faint click from the ignition pulse, and then the lamp comes on ,initially with a slightly dim, bluish-white light that brightens over the next 20–30 seconds to full output.
When ignition slows ,the lamp takes 2, 3, 5 or more seconds to come on, or requires the light switch to be cycled multiple times before the lamp catches ,the ignition circuitry in the control unit is degrading.
The Ignition Process
Striking the arc in an HID lamp requires generating a very high voltage pulse ,typically 20,000 to 30,000 volts ,for a fraction of a second. Inside the control unit, a series of capacitors charge to this voltage and then discharge through the lamp in a rapid pulse. If the capacitors are aging, their ability to charge to the required voltage diminishes. The pulse they deliver may be insufficient to reliably strike the arc, requiring multiple attempts.
Cold vs Warm Restart
An interesting diagnostic detail: the ignition difficulty is often worse when the lamp is cold (first start of the day) versus when it's warm. This is because a cold lamp requires a higher ignition voltage than a warm one. If the control unit's capacitors can still generate enough voltage for a warm restart but struggle with a cold start, you'll notice the problem is worst in the morning and less evident if you switch the lights off briefly and back on during a drive.
What This Means Practically
Delayed ignition is an early warning sign ,the unit isn't completely failed, but the ignition circuitry is weakening. Left unaddressed, delayed ignition progresses to failed ignition ,the lamp simply won't strike at all. This is the point where you're driving with one headlight, which is both a safety issue and a legal one on Australian roads.
Sign 3: One Light Working, One Completely Dead
This is the symptom that sends most people hunting for answers ,one HID light functions normally, the other simply doesn't come on at all.
The Systematic Diagnostic Approach
The challenge with a completely dead light is that several components could be responsible: the control unit, the lamp, a fuse, or a wiring fault. The most efficient diagnostic tool here is the component swap test:
• Swap the control unit from the non-working side to the working side, and vice versa
• If the fault moves ,the side that was working now doesn't ,the control unit is confirmed faulty
• If the fault stays on the same side ,the previously dead side is still dead with the known-good unit ,move on to swapping the lamp
• If swapping the lamp also doesn't fix it, the issue is in the wiring, connector, or vehicle-side power supply for that circuit
This logical process eliminates guesswork and means you only replace what's actually failed.
Why Control Units Fail Completely
A control unit that fails completely ,producing no output at all ,has typically experienced a protection circuit shutdown (thermal cutoff, short circuit protection, or over-voltage protection) that won't reset, or a catastrophic failure of a core component such as the main transformer, output transistors, or control IC.
In protection shutdown scenarios, the unit may recover after cooling down ,which means the fault appears intermittent at first. The light works for an hour, then stops. Works the next day, stops again. This intermittent pattern often indicates thermal shutdown from overheating, which can be caused by inadequate mounting, restricted airflow around the unit, or an internal fault that generates excess heat.
Sign 4: Lights Cutting Out at Highway Speed or Under Load
This is one of the more alarming symptoms because it happens at the worst possible time ,driving at speed in the dark, when good visibility is at a premium. The lights switch off suddenly, leaving you in near-darkness, then may come back on after a short period.
Thermal Shutdown
The most common cause of this symptom is thermal shutdown ,the control unit overheating and triggering its internal protection circuit. The unit cuts output to prevent damage, cools down over 30–60 seconds, and then restores operation.
Thermal shutdown can be caused by:
• A unit that's mounted poorly ,against a surface with no airflow, or too close to heat-generating components
• A unit that has developed an internal fault causing it to generate more heat than normal
• Ambient temperatures that push the unit beyond its rated operating range ,particularly relevant in northern Australia during summer
• A 55W high-power system in a housing or installation that was designed for 35W ,significantly more heat to manage
Vibration-Related Intermittency
Australian road conditions ,corrugated outback tracks, rough station roads, the general state of rural infrastructure ,put significant vibration stress on vehicle components. Control units with internal solder joint micro-cracks may produce intermittent faults that appear and disappear based on vibration. The connection makes and breaks as the vehicle moves, causing the light to cut in and out unpredictably.
The Safety Dimension
Lights cutting out at highway speed is not just an inconvenience ,it's a genuine safety hazard. If you're experiencing this symptom, reduce night driving until the fault is diagnosed and rectified. A unit showing thermal shutdown should be inspected for mounting and ventilation issues before being reinstalled. One that appears to be failing due to vibration or internal fault should be replaced.
Sign 5: Colour Shift in One or Both Lights
A noticeable colour shift ,one light appearing more yellow, pink, green-tinged, or generally different in colour from the other ,can point to either the control unit or the lamp depending on the specific colour observed and the pattern of the shift.
What Colour Tells You
HID lamps produce a characteristic colour temperature when the arc is running at its correct operating conditions. The colour temperature is determined by the lamp chemistry ,the specific halide salts used ,combined with the correct operating voltage and power delivered by the control unit.
When the control unit is not maintaining correct operating voltage ,either running the lamp at above or below specification ,the colour shifts. An underdriven lamp (below correct power) tends to shift toward yellow or orange. An overdriven lamp (above correct power) can shift toward blue-white, and typically this is accompanied by reduced lamp life.
One Side Different from the Other
If one light has shifted noticeably from the other, and both lamps are of the same type and similar age, the discrepancy is most likely in the control unit on the affected side. The lamp on that side may also be aging faster as a consequence of incorrect power delivery ,which means even after replacing the control unit, you may need to replace the lamp shortly after if it's been running in suboptimal conditions for some time.
When It's the Lamp Not the Unit
If both lights have shifted colour equally ,both now look more yellow than they used to ,and both are of similar age, lamp aging is the more likely explanation. Lamp colour shifts gradually as the metal halide chemistry is consumed over the lamp's life. This is normal end-of-life behaviour for lamps rather than a unit fault.
Sign 6: Unusual Sounds or Smells
Clicking or Ticking
A brief click when HID lights are switched on is completely normal ,that's the sound of the high-voltage ignition pulse being fired. Clicking that continues after the lamp has ignited and reached operating temperature is not normal. It suggests the ignition circuit is repeatedly firing when it shouldn't be ,the unit is struggling to maintain the arc and repeatedly attempting to reignite it.
High-Pitched Whining or Buzzing
Some degree of high-frequency noise from HID control units is not uncommon ,the switching circuits operate at frequencies that can sometimes be audible. However, a noticeable increase in pitch or volume compared to previous operation, or a buzzing that accompanies flickering, suggests internal component degradation. Capacitors and transformers can make audible noise as they age and their characteristics change.
Burning Smell
A burning smell from the engine bay after running HID lights ,particularly if localised to one area ,is a warning that should not be ignored. It can indicate:
• A unit overheating due to internal fault or inadequate ventilation
• Wiring insulation melting near the unit due to loose connections causing arcing
• Internal component failure producing heat beyond what the unit can safely dissipate
If you smell burning near your HID components, switch the lights off and inspect the area when it has cooled. Look for discolouration, melted insulation, or any signs of heat damage on the unit or its wiring.
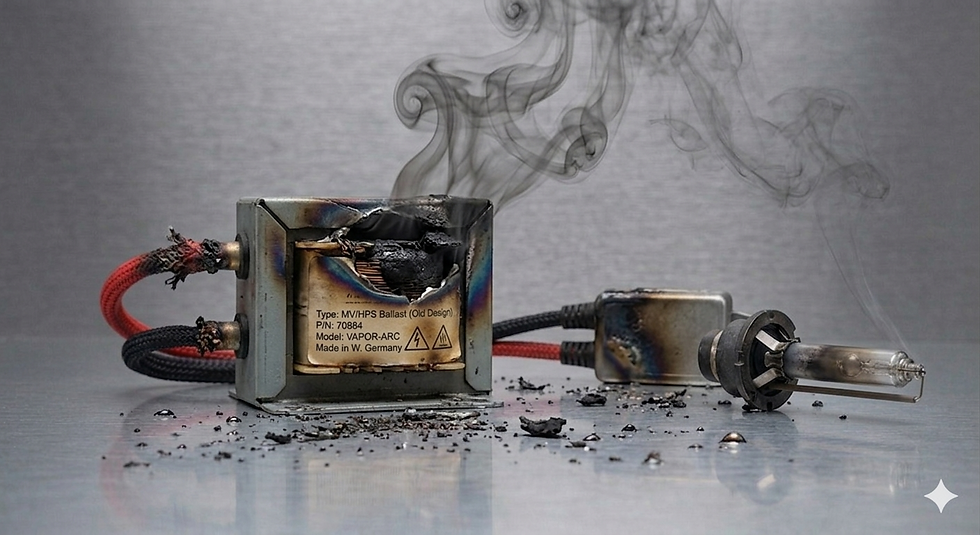
Sign 7: Physical Damage You Can See
Visual inspection of the control unit often tells you more than any electrical test ,particularly if you're dealing with a unit that has been in service for several years in harsh conditions.
What to Look For
• Burn marks or heat discolouration on the unit casing ,dark staining or blistering of the plastic or metal housing indicates internal overheating
• Swelling or cracking of the casing ,internal component failure (particularly capacitors) can cause physical deformation
• Corrosion on connector pins ,common on units exposed to water ingress, coastal salt air, or the humidity cycles common in tropical Australia. Green or white oxidation on pins causes resistance that affects performance and can cause intermittent faults
• Melted or damaged wiring at the connectors ,a sign of excessive heat from a loose or high-resistance connection
• Physical impact damage ,units mounted in exposed positions on 4WDs can take rock strikes or debris hits on tracks that can crack the housing and compromise the internal electronics
Corrosion in Australian Conditions
For Australian vehicles ,particularly those used in tropical north Queensland, coastal areas, or the wet environments of the Kimberley and Top End ,corrosion on electrical components is a persistent issue. The combination of high humidity, salt air, and temperature cycling creates an aggressive environment for connectors and housings.
A unit that looks fine from a distance but has corroded pins at its connectors can behave exactly like a failing unit ,intermittent faults, flickering, delayed ignition ,without the internal electronics being at fault at all. Always clean and inspect connectors thoroughly before concluding the unit itself needs replacing.
Sign 8: Dashboard Warning Light for Lighting Fault
Modern vehicles ,particularly those from European manufacturers and higher-specification Japanese and Korean models from the past 10–15 years ,have sophisticated electrical monitoring that can detect when a lighting circuit isn't behaving as expected.
Why False Lamp Failure Warnings Occur
HID systems draw a different current profile than the halogen globes the vehicle was originally designed to monitor. A standard halogen circuit monitor expects a certain current draw ,HID circuits draw differently. This is why Canbus-compatible components exist: they're designed to present an electrical signature that the vehicle's monitoring system interprets as correct.
When the Warning Is Genuine
If your vehicle has been running HID without triggering warnings and a fault warning suddenly appears ,or if a warning appears after previously reliable operation ,it can indicate:
• The control unit is drawing abnormal current due to an internal fault
• The lamp has failed and the absence of load is detected by the vehicle's monitoring system
• A wiring fault has changed the circuit's electrical characteristics
In vehicles with full OBD2 diagnostic capability, a mechanic can read the specific fault code associated with the warning, which narrows down the component significantly. For aftermarket HID installations, an auto electrician familiar with these systems is the most reliable diagnostic resource.
Fault Symptom Diagnostic Guide
Symptom | Most Likely Cause | Confirm With | Action |
Flickering when warm | Failing regulation circuit | Swap units between sides | Replace unit if fault follows |
Slow/failed cold ignition | Degraded ignition capacitors | Note if worse when cold | Replace unit |
One side completely dead | Unit, lamp, or wiring | Swap test ,unit first, then lamp | Replace confirmed faulty component |
Cuts out at speed, recovers | Thermal shutdown or vibration | Check mounting and ventilation | Inspect or replace unit |
Colour shift one side | Unit delivering wrong voltage | Compare both sides; swap test | Replace unit; check lamp too |
Burning smell | Overheating or wiring fault | Visual inspection of unit and wiring | Urgent ,inspect immediately |
Clicking after ignition | Repeated ignition attempts | Listen timing relative to startup | Replace unit |
Visible burn/corrosion | Physical/thermal damage | Visual inspection | Replace unit; repair wiring if needed |
Dashboard warning light | Canbus fault or circuit fault | OBD scan for specific code | Diagnose code; check connections |
The Swap Test: Your Best Diagnostic Tool
Running through the swap test properly is worth covering in its own section because it's genuinely the most reliable way to confirm a control unit fault without specialist equipment.
How to Do It Correctly
The principle is simple: if the fault follows a component when you move it, that component is the cause. Here's the step-by-step process:
• Identify which side has the fault ,left or right, let's say the driver's side is the problem
• Disconnect the control unit on the driver's side and the control unit on the passenger's side
• Reconnect each unit to the opposite side's wiring and lamp ,driver's side unit now connected to passenger's side, and vice versa
• Switch on the lights and observe
• If the passenger side (now running the driver's side unit) now shows the fault, and the driver's side (now running the passenger's side unit) works correctly, the fault is confirmed in the driver's side unit
• If the fault remains on the driver's side regardless of which unit is connected, the unit is not the cause ,the lamp or wiring on that side is the issue
When You Can't Do the Swap Test
On some vehicles, the control units are integrated into the lamp assembly or are physically located in positions that make swapping impractical without significant disassembly. In these cases, an auto electrician with an HID tester can measure output voltage and current directly from the unit to confirm whether it's operating within specification. This is the professional equivalent of the swap test.
Replacing a Failing Unit: What to Know
Match the Specification
When replacing, the new unit must match the wattage of the lamp it's driving ,a 35W lamp requires a 35W unit, a 55W lamp requires a 55W unit. Fitting the wrong wattage will either underdrive or overdrive the lamp, causing poor performance and premature failure.
Quality Matters
The Australian market has a significant supply of very cheap replacement units from generic suppliers. At $15–$25 each, they're tempting ,but quality control in this segment is highly variable. A cheap unit may last 6 months before showing the same symptoms you just fixed. Quality units from reputable brands ,Philips, Osram, Narva, Hella, Lightforce ,typically cost $60–$150 but are engineered to last and perform reliably.
Replace Both Sides at the Same Time
If one control unit has failed after years of service, the other is likely at a similar point in its life cycle. Replacing both at the same time adds minimal cost compared to doing the job twice in quick succession, and eliminates the asymmetric situation where one light is running a new unit and the other a near-end-of-life unit.
Check the Lamps at the Same Time
If the control unit has been delivering incorrect power for some time before the fault became obvious, the lamp may have been running in suboptimal conditions. A lamp that looks functional now may have shortened lifespan as a result. If the lamps are more than 18–24 months old or have been running alongside a faulty unit, replacing them at the same time as the control unit is the most practical approach.
Australian Conditions and Why Units Fail Sooner Here
Australian conditions are genuinely harder on HID components than the environments most products are tested and rated for, and understanding this helps with both prevention and realistic expectation setting.
• Heat ,ambient temperatures in northern and inland Australia regularly exceed 40°C. Engine bay temperatures go considerably higher. HID control units generate their own heat during operation, and in a hot environment that heat has less room to dissipate. Units rated to +105°C operate with a narrower safety margin in Darwin in February than in Melbourne in July
• Vibration ,corrugated outback tracks, rocky station roads, and the general state of remote Australian roads create sustained vibration that accelerates micro-crack formation in solder joints inside control units. This is one of the primary failure modes for units on 4WDs used in genuine off-road conditions
• Dust ,fine dust finds its way into connector housings and can compromise electrical connections, causing the resistance-related intermittent faults that look very similar to an internal unit fault
• Water crossings ,vehicles that do creek crossings and water obstacles can expose components to immersion or sustained splash. Units not rated for water exposure can fail from moisture ingress
For vehicles used in demanding Australian conditions, choosing units with IP67 or higher waterproofing ratings, using dielectric grease on all connectors, and mounting with attention to ventilation and vibration isolation will significantly extend service life.
The Bottom Line
A control unit that's starting to fail rarely fails silently or suddenly. It gives you signs ,a flicker here, a slow start there, an intermittent cutout that you tell yourself was a one-off. The mistake most people make is dismissing these early warnings until the unit fails completely at the most inconvenient moment.
The symptoms covered in this guide are specific enough to point clearly at the control unit versus other components in most cases. The swap test confirms the diagnosis without specialist tools. And once confirmed, replacing with a quality unit from a reputable brand is a straightforward fix that restores the lighting system to reliable operation.
If you're running HID lighting on a vehicle used in demanding Australian conditions ,remote travel, off-road tracks, outback distances ,treat the first sign of trouble as a prompt to address it rather than watch it develop. Being left without lighting on a remote highway or a dark outback track is a situation that's very easy to prevent.
Frequently Asked Questions
How long should an HID control unit last before it needs replacing?
A quality HID control unit from a reputable manufacturer should last the life of the vehicle under normal operating conditions ,typically the equivalent of 80,000 to 150,000 km or more in terms of operational hours. The unit contains no moving or consumable parts; it degrades through electronic component aging, thermal cycling stress, and environmental exposure. In practice, the lamp (typically rated at 2,000–3,000 operating hours) usually reaches the end of its life before the control unit does, assuming the unit is quality and the installation is correct. Units that fail significantly earlier ,within 20,000–40,000 km ,are usually either poor-quality products, incorrectly installed (thermal or vibration issues), or subject to an underlying electrical fault in the vehicle circuit that's shortening their life. If you're replacing control units regularly, investigate the installation and vehicle circuit rather than assuming it's a product quality issue.
Can I repair a failing HID control unit or does it need to be replaced?
Component-level repair of HID control units is technically possible ,the units contain standard electronic components (capacitors, transistors, transformers, control ICs) that can be individually replaced. However, the practical considerations make repair the exception rather than the rule for most Australian drivers. The units are typically sealed or potted in epoxy resin, making access to internal components difficult. Identifying the specific failed component requires electronic testing equipment and expertise. And the labour cost of diagnosis and repair by a qualified electronics technician often exceeds the cost of a quality replacement unit. Repair is most practical for OEM units on European vehicles where replacement prices are genuinely high ,$300 to $600+ for some OEM units. For standard aftermarket units in the $60–$150 range, replacement is almost always the more economical and reliable choice.
Does a failing HID control unit damage the lamp?
Yes ,it can, and this is one of the less-obvious consequences of running a degrading unit for an extended period. The lamp is sensitive to the quality of power it receives. A control unit that's delivering incorrect voltage (too high or too low), unstable output (causing arc fluctuation), or incorrect warm-up current management puts additional stress on the lamp's internal chemistry and electrode structure. Lamps that have been running through a failing unit typically show accelerated aging ,colour shift toward yellow or orange, reduced brightness, and in some cases physical electrode damage. After replacing a failed control unit, it's worth assessing the condition of the lamp that ran through it. If the lamp is more than 18 months old and has been running through a visibly failing unit, replacing it at the same time as the control unit avoids the situation where a fresh unit is installed but the lamp fails shortly after anyway.


Comments